Deploy Azure VPNs With Intune
PLEASE NOTE: This is no longer the best way to automate adding VPN connections to the Azure VPN Client. You can now import XML files from the command line. (Microsoft Documentation)
Azure Active Directory was recently added as an authentication type for Azure P2S VPNs. Like many Azure administrators, I was extremely excited. However, excitement quickly turned to disappointment when I found that configuring the Azure VPN Client included manually importing an XML file. This isn’t a feasible solution when my organization could eventually have hundreds of users utilizing VPN connections. Eventually I was able to find a way to automate the process. If you are experiencing the same frustration then the information below may help.
Prerequisites
This article assumes that you have already setup an Azure Point-To-Site VPN with an OpenVPN tunnel type and Azure Active Directory authentication type. It also assumes you have also downloaded the Add-AzureVPNConnection.ps1 script or copied it from the “PowerShell Script (Add-AzureVPNConnection)” section below.
Azure VPN Client Background Information
The following folder is created when the client is installed:
%LOCALAPPDATA%\Packages\Microsoft.AzureVpn_8wekyb3d8bbwe\LocalState\
After importing an azurevpnconfig.xml file, a RASPhone file (rasphone.pbk) is created in the directory listed above. This file contains the connection information for any VPNs that have been added to the client.
Installing the Azure VPN Client with Intune
The Azure VPN Client can be installed through Intune if you have configured the Microsoft Store for Business and connected it to your Intune tenant. If you have not, this video can point you in the right direction.
Adding/Updating the Azure VPN Client Connections with PowerShell and Intune
Summarized Process
- Download the azurevpnconfig.xml file
- Make any necessary changes such as adding DNS servers or custom routes (Microsoft Documentation)
- Import the file into the Azure VPN Client on your local machine
- Open the rasphone.pbk file in a text editor
- Copy the configuration information from the rasphone.pbk file
- Paste it into the RASPhoneEntry parameter in the Add-AzureVPNConnection script (see below), edit the NewVPNHeader parameter, and save the script
- Create a new script in Intune that runs under the logged on credentials and upload the script
- Assign the policies to user or device groups as necessary
Detailed Process
-
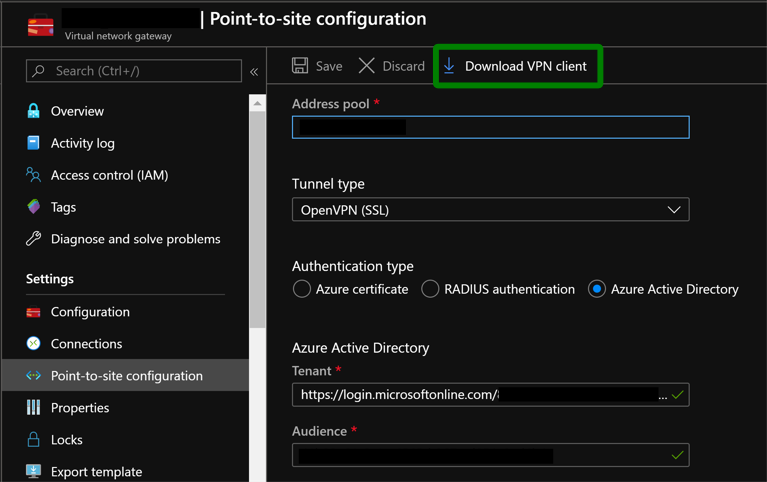
Download the azurevpnconfig.xml file
- Within the virtual network gateway resource, choose “point-to-site configuration” on the left had side bar.
- Select the Download VPN Client option.
- When the download is complete, remove the azurevpnconfig.xml file from the .zip.
-
Make changes to the XML file if necesaary (DNS servers or custom routes)
- See the botton of this (Microsoft Documentation) for the correct synthax for adding DNS servers and custom routes
-
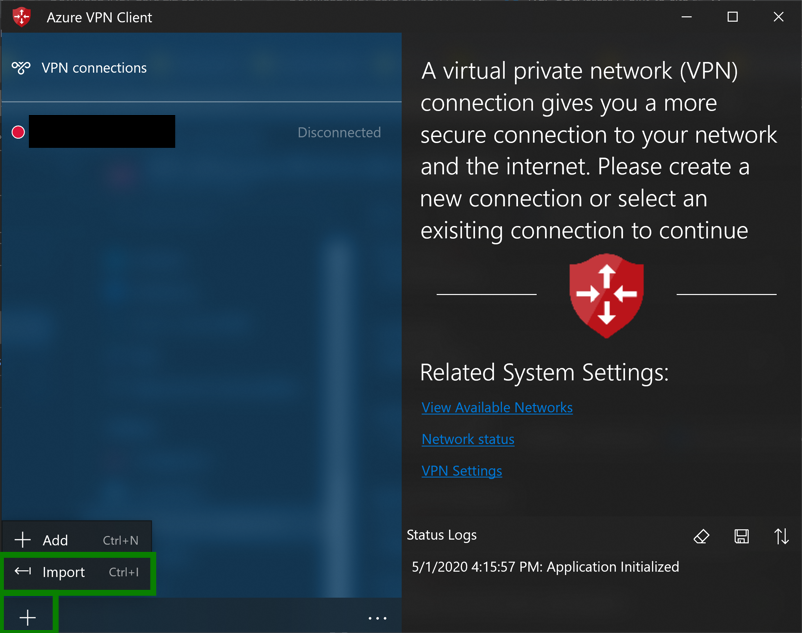
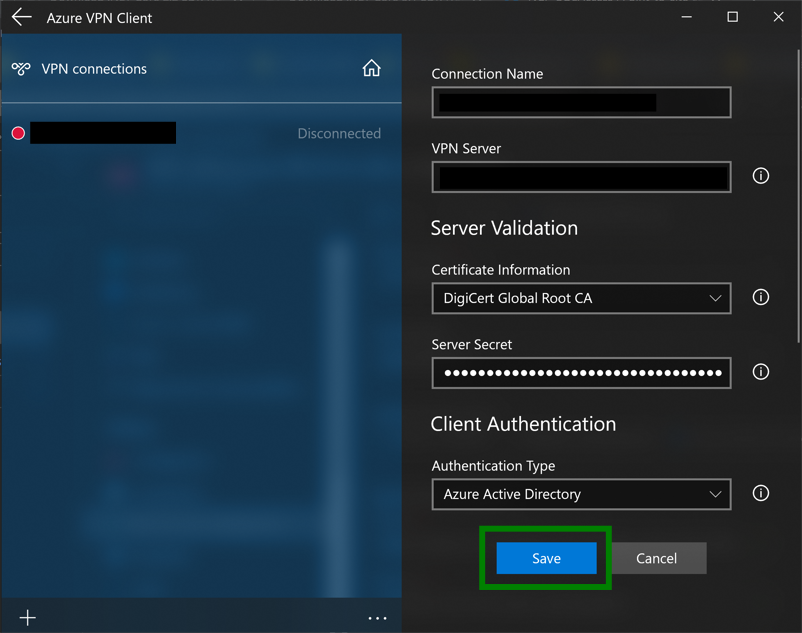
Import the file into the Azure VPN Client on your local machine
-
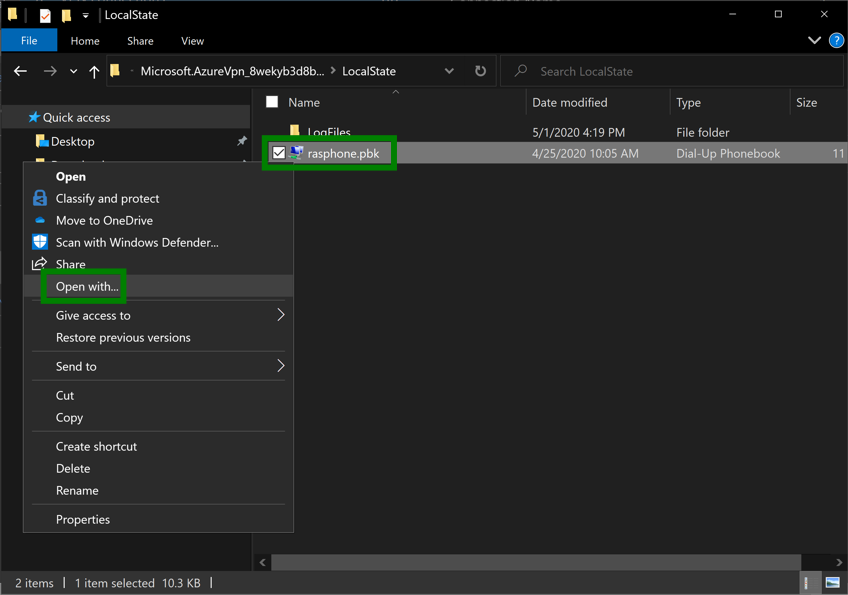
Open the rasphone.pbk file in a text editor
- Browse to %LOCALAPPDATA%\Packages\Microsoft.AzureVpn_8wekyb3d8bbwe\localstate and open rasphone.pbk with a text editor
-
Copy the configuration information
- Copy all the text in the rasphone.pbk file
-
Edit the RASPhoneEntry parameter, the NewVPNHeader parameter, and the ScriptLogLocation parameters in the Add-AzureVPNConnection script and save it
- Paste the text into the RASPhoneEntry parameter of the script (between @" and “@)
- Edit the NewVPNHeader parameter to match the first line of the RASPhoneEntry parameter
- Edit the ScriptLogLocation parameter to a folder where the log can be placed (on the target machine)
- Save the script
-
Create a new script in Intune that runs under the logged on credentials and upload the Add-AzureVPNConnection script
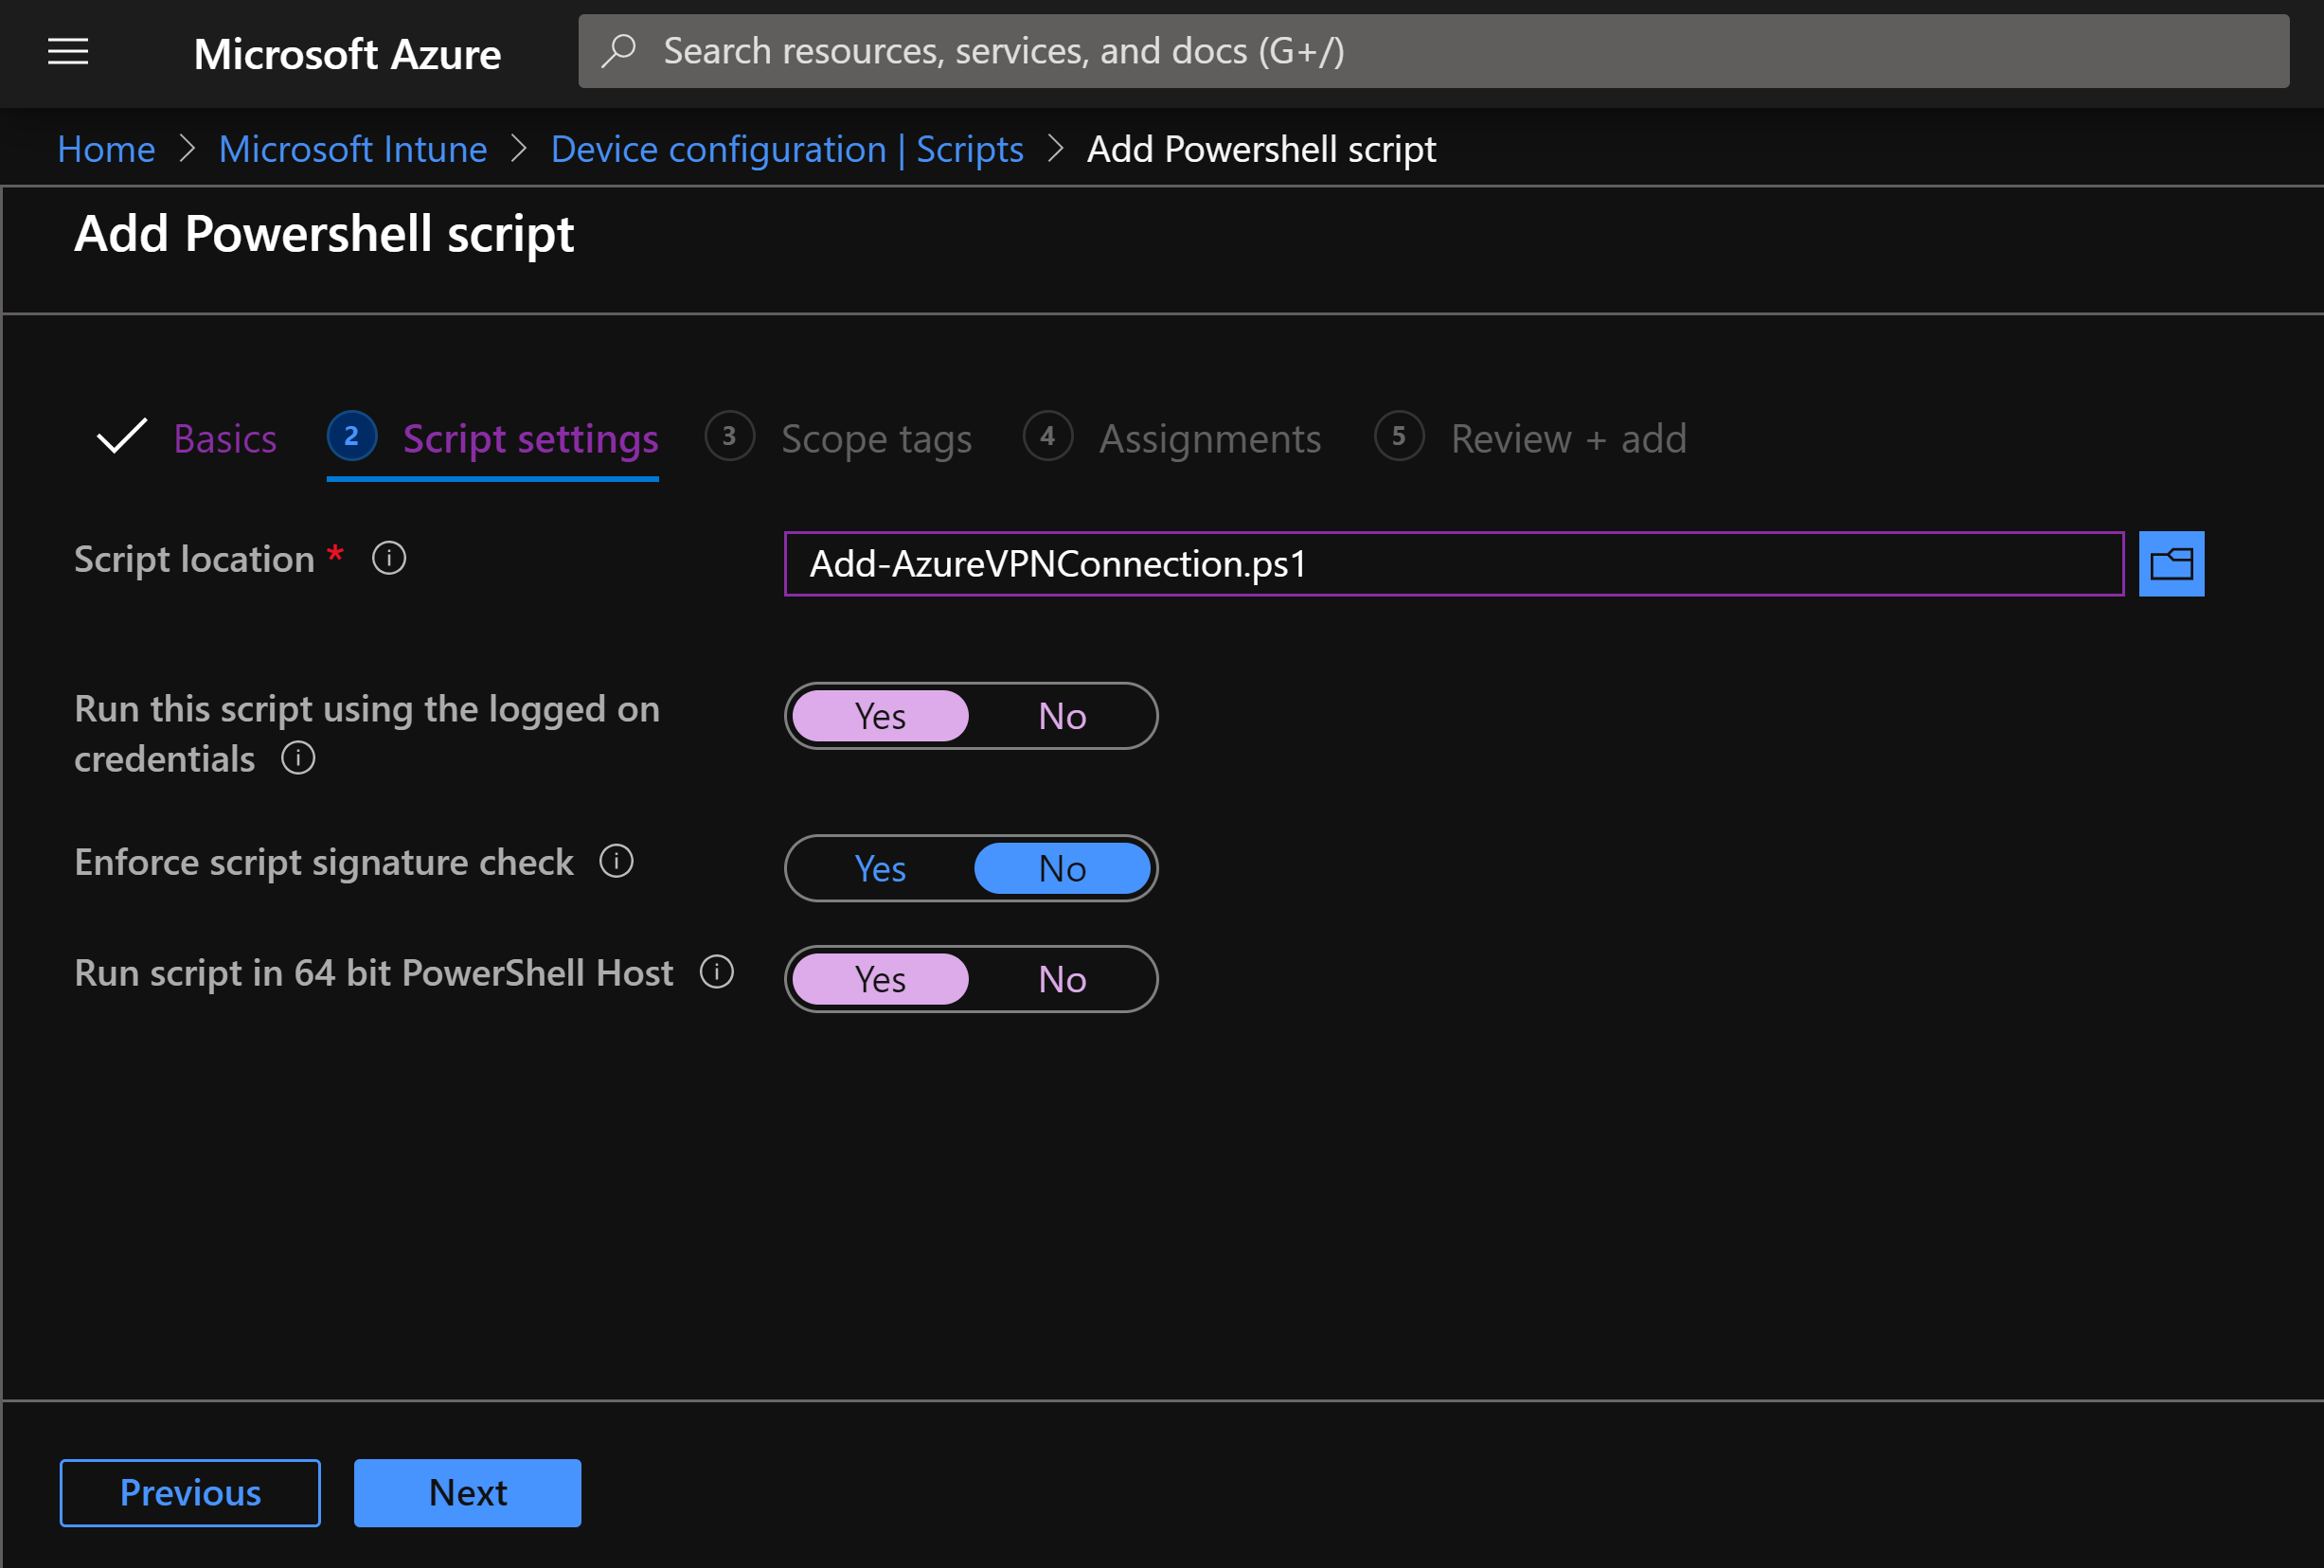
-
Assign the policies to user or device groups as necessary
- Assign this script to any user or device groups who need it. They will receive the new or edited VPN connection!
PowerShell Script (Add-AzureVPNConnection)
This can download the file from my github but the code is also shown below.
<#
.SYNOPSIS
    Adds a VPN to the Azure VPN Client.
.DESCRIPTION
    Adds a VPN to the Azure VPN Client. Replaces a current VPN if it has the same name. Does not remove other existing VPNs.
.PARAMETER ScriptLogLocation
    The directory in which you would like the log file
.PARAMETER LogFileName
    The name (with extension) you would like for the log file
.PARAMETER AzureVPNClientDirectory
    The full path to the directory in which the Azure VPN Client stores information.
.PARAMETER LocalStateDirectory
    The full path to the directory where the log files directory and rasphone.pbk file are stored.
.PARAMETER RASPhoneFile
    The full path of the rasphone.pbk file used by Azure VPN Client.
.PARAMETER NewVPNHeader
    The header in the rasphone.pbk file for the the VPN that will be added or replaced. This should match the first line of the RASPhoneEntry.
.PARAMETER RASPhoneEntry
    The full entry that will be added to the rasphone.pbk file.
.INPUTS
    None
.OUTPUTS
    Log file stored in C:\ExampleFolder\Add-AzureVPNConnection\Add-AzureVPNConnection.log
.NOTES
    Version:        1.0
    Author:         Jason Beer
    Creation Date:  3/25/2020
    Purpose/Change: Initial script development
#>
param(
[string]$ScriptLogLocation = "C:\ExampleFolder\Add-AzureVPNConnection",
[string]$LogFileName = "Add-AzureVPNConnection.log",
[string]$AzureVPNClientDirectory = "$env:LOCALAPPDATA\Packages\Microsoft.AzureVpn_8wekyb3d8bbwe",
[string]$LocalStateDirectory = (Join-Path $AzureVPNClientDirectory "LocalState"),
[string]$RASPhoneFile = (Join-Path $LocalStateDirectory "rasphone.pbk"),
[string]$NewVPNHeader = "[VPN Connection Name]",
[string]$RASPhoneEntry =
@"
CONNECTION INFORMATION GOES HERE
"@
)

# Start Logging (path will be created if it doesn't already exist)
Start-Transcript -Path (Join-Path $ScriptLogLocation $LogFileName) -Append

# Check if Azure VPN Client is installed by checking for this directory (It is added during install and removed during uninstall)
$IsInstalled = Test-Path -LiteralPath $AzureVPNClientDirectory

# This file is created when the first VPN conenction is added. Additional VPN connections are appended to the file
$VPNsExist = Test-Path -LiteralPath $RASPhoneFile

if($IsInstalled -and !$VPNsExist){ # Installed but no VPNs configured
    Write-Host "The Azure VPN Client is installed and no VPNs exist. Creating the rasphone.pbk file and adding this connection."
    # Create a rasphone.pbk file with the connection information
    #   Commenting out the line below. It should work but it looks like there is a bug in PowerShell 5.1
    #   The File does not get created with UTF8 encoding and therefore the VPN client cannot read it -Jason Beer
    #$RASPhoneEntry | Out-File -Encoding "UTF8" -LiteralPath $RASPhoneFile -NoClobber -Force
    #   Using this method instead
    $Utf8Encoding = New-Object System.Text.UTF8Encoding $False
    [System.IO.File]::WriteAllLines($RASPhoneFile, $RASPhoneEntry, $Utf8Encoding)
}
elseif($IsInstalled -and $VPNsExist){ # Installed and VPNs Exist
    Write-Host "The Azure VPN Client is installed and some VPNs exist. Adding this VPN connection."
    # Create a backup of the current rasphone.pbk file before making any edits
    #   First find an available file name for the backup
    #   (starts with rasphoneBACKUP01.pbk and continues iterating until an available name is found)
    $BackupFileNameBase = "rasphoneBACKUP"
    $BackupFileExtension = ".pbk"
    $i=0
    Do{
        $i++
        $iFormatted = "{0:D2}" -f [int32]$i
        $BackupFileName = "$BackupFileNameBase$iFormatted$BackupFileExtension"
        $FullBackupPath = Join-Path $LocalStateDirectory $BackupFileName
    }While(Test-Path -LiteralPath $FullBackupPath)

    #   Create a new backup with the unused backup name
    Copy-Item -LiteralPath $RASPhoneFile -Destination $FullBackupPath

    # Load the file's content into an array
    #   Each element of the array is a differnet line in the file
    $FileContent = Get-Content -LiteralPath $FullBackupPath

    # Loop through the content one line at a time to find the different VPN setups
    #   Each VPN has a "header" like [VPN Name] then is followed by the settings
    $CurrentVPNs = @()
    For($i=0;$i -lt $FileContent.count;$i++){
        # If this line of the file is a VPN "header" then add that VPN to the array of VPNs
        if($FileContent[$i] -like "[[]*[]]"){
            $CurrentVPNs += [PSCustomObject]@{
                Header = $FileContent[$i]
                StartLine = $i
                EndLine = $null
            }
            # Update the EndLine of the previous VPN if this isn't the first VPN found
            if($CurrentVPNs.count -gt 1){
                $CurrentVPNs[$CurrentVPNs.count-2].EndLine = $i-1
            }
        }
        # If this is the last line of the file, update the last VPNs EndLine
        if($i -eq $FileContent.Count-1){
            $CurrentVPNs[$CurrentVPNs.count-1].EndLine = $i
        }
    }

    # Check if any of the current VPNs have the same name as the new VPN, if not add them to the new array
    $NewVPNs = $null
    Foreach($VPN in $CurrentVPNs){
        if($VPN.Header -ne $NewVPNHeader){
            $NewVPNs += $FileContent[$VPN.StartLine..$VPN.EndLine]
        }
        elseif($VPN.Header -eq $NewVPNHeader){
            $Utf8Encoding = New-Object System.Text.UTF8Encoding $False
            [System.IO.File]::WriteAllLines($RASPhoneFile, $RASPhoneEntry, $Utf8Encoding)
        }
        else{
            Write-Error -Message "Something unexpected happened."
        }

        # Overwrite the existing file with the new VPN information
        $Utf8Encoding = New-Object System.Text.UTF8Encoding $False
        [System.IO.File]::WriteAllLines($RASPhoneFile, $RASPhoneEntry, $Utf8Encoding)
        if($NewVPNs){
            $NewVPNs | Out-File -LiteralPath $RASPhoneFile -Encoding "UTF8" -Append -Force
        }
    }
}
elseif(!$IsInstalled){ # Client isn't installed
    Write-Host "The Azure VPN Client is not installed. Creating the directories, the rasphone.pbk file, and adding this connection."

    if(Test-Path -Path $LocalStateDirectory){
        Write-Host "The LocalState directory already exists."
    }
    else{
        Write-Host "Creating the LocalState directory."
        New-Item -ItemType Directory -Path $LocalStateDirectory
    }
    # Create a rasphone.pbk file with the connection information
    #   Commenting out the line below. It should work but it looks like there is a bug in PowerShell 5.1
    #   The File does not get created with UTF8 encoding and therefore the VPN client cannot read it -Jason Beer
    #$RASPhoneEntry | Out-File -Encoding "UTF8" -LiteralPath $RASPhoneFile -NoClobber -Force
    #   Using this method instead
    $Utf8Encoding = New-Object System.Text.UTF8Encoding $False
    [System.IO.File]::WriteAllLines($RASPhoneFile, $RASPhoneEntry, $Utf8Encoding)
}
else{
    Write-Error -Message "Something unexpected happened."
}

# Stop Logging
Stop-Transcript
FAQs
What if the PowerShell script runs before the Azure VPN Client install?
This is not a problem. The folder structure and rasphone.pbk file will be created. When the Azure VPN Client is installed, it does not overwrite or remove the file.
Why don’t you just copy the rasphone.pbk file from your machine to the other machines?
You could definitely find a way to do this with Intune. However, this script gives more flexibily. It allows you to add new VPN connections without messing up existing connections. It can also allow you to edit an existing connection.