Configure Secondary Zone – Windows Server 2016
This is a guide for configuring a secondary zone using DNS Manager. To do this with PowerShell, please see Configure Secondary Zone with PowerShell – Windows Server Core 2016.
How-To
Prerequisites
Before starting, you should have the DNS role installed on the server. To install the DNS role, please see one of the following articles:
Installing the DNS Role with PowerShell -Windows Server Core 2016
Installing the DNS Role using Server Manager – Windows Server 2016
Assumptions
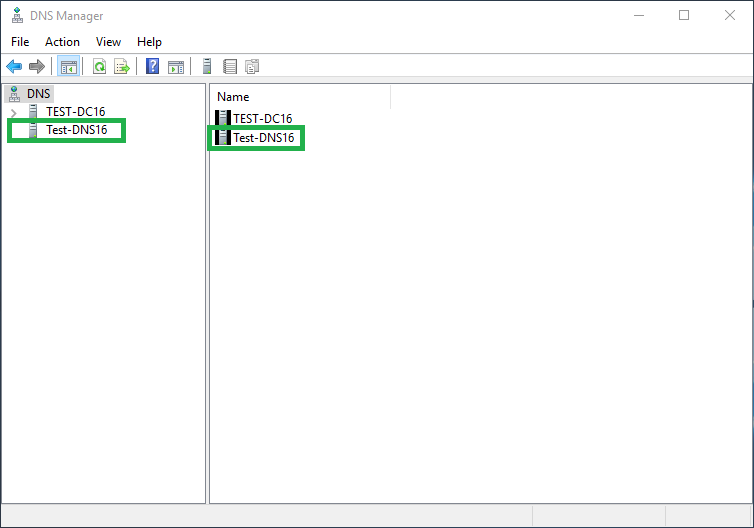
In this guide I am adding a secondary zone to a remote server (Test-DNS16) from the server that has the primary zone (Test-DC16).
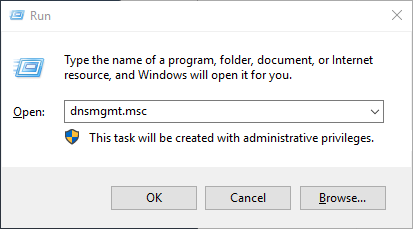
1) Open DNS Manager
Open the Run box using Win+R, type dnsmgmt.msc, and click OK
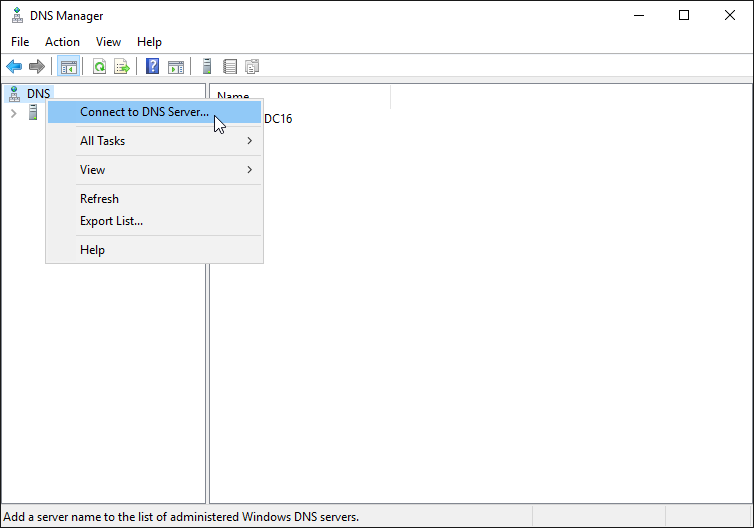
2) Connect to the remote server that will have the secondary zone
If you are on the server that is getting the secondary zone, skip this step
Right click the DNS and select Connect to DNS Server…
Enter the name of the server and click OK
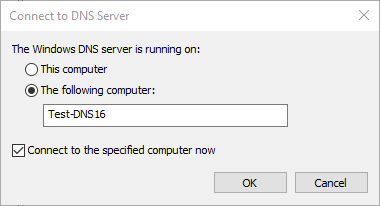
You should now see the other DNS server listed
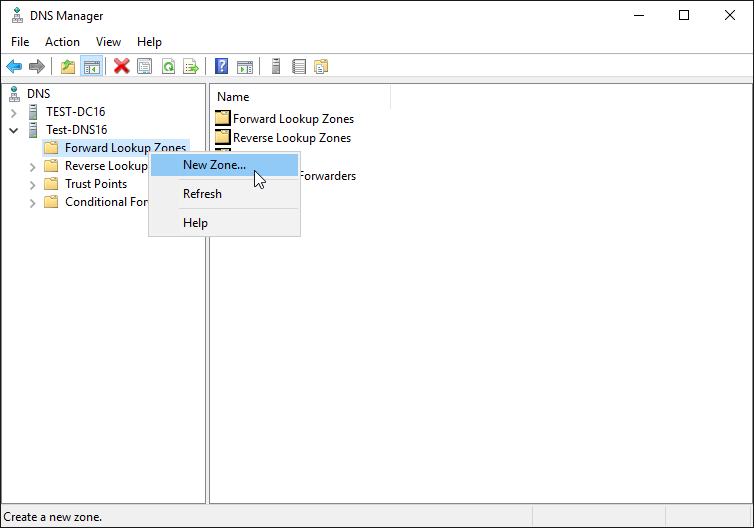
3) Open the New Zone Wizard
Select the drop-down for the DNS server that will have the secondary zone
Right click Forward Lookup Zones and select New Zone…
4) Click Next

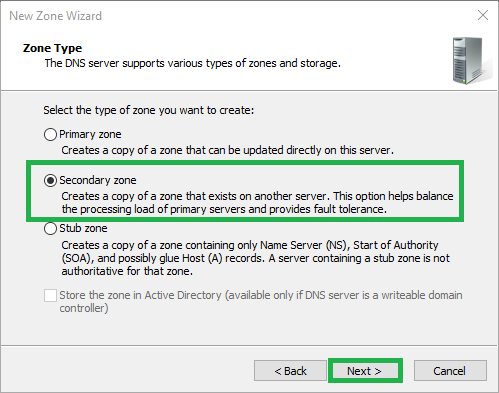
5) Select Secondary zone then click Next
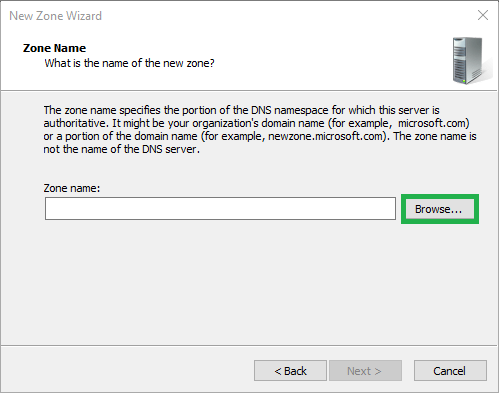
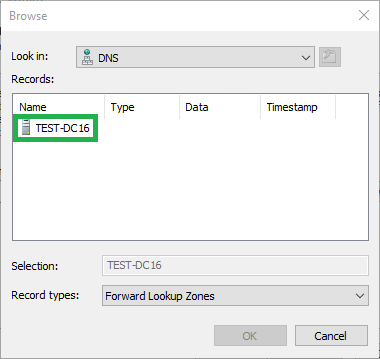
6) Enter the zone name or click Browse
If you know the zone name, type it in and skip step 7
If you do not know the name, click Browse
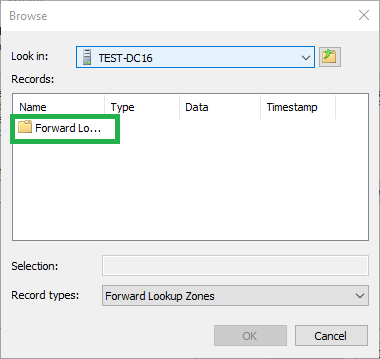
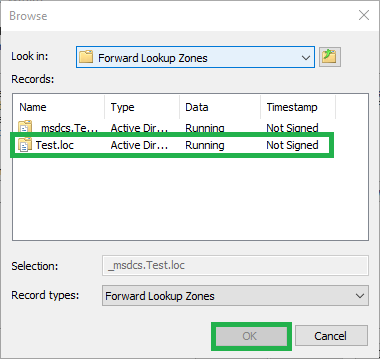
7) Select the zone
Select the server that contains the primary zone
Select Forward Lookup Zones
Select the zone you want to copy and click OK
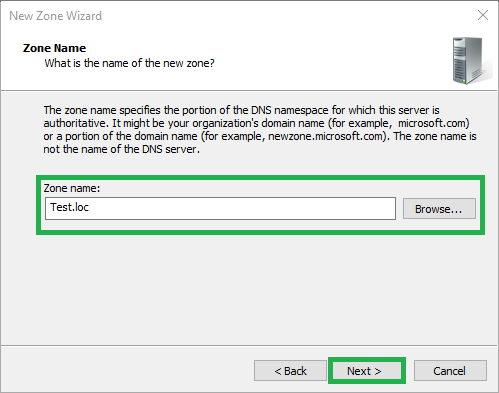
8) Click Next
The box should now show the zone you selected
Click Next
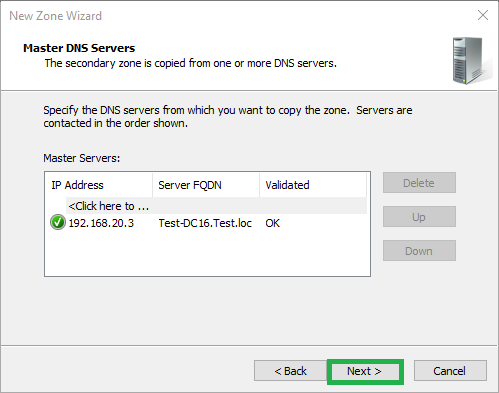
9) Add the master servers
Type in the IP address(es) or FQDN(s) of the server(s) that have the primary zone you are copying
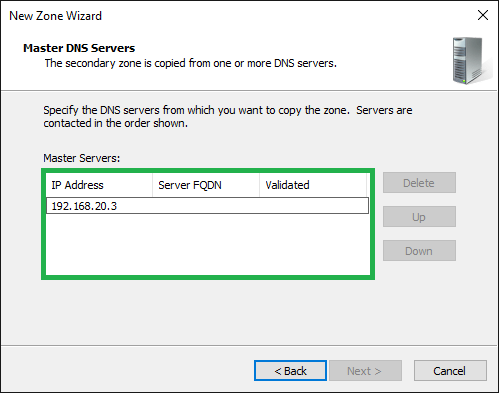
Click Next
10) Click Finish
Click Finish to complete the process and add the secondary zone
You have now successfully added a secondary zone!
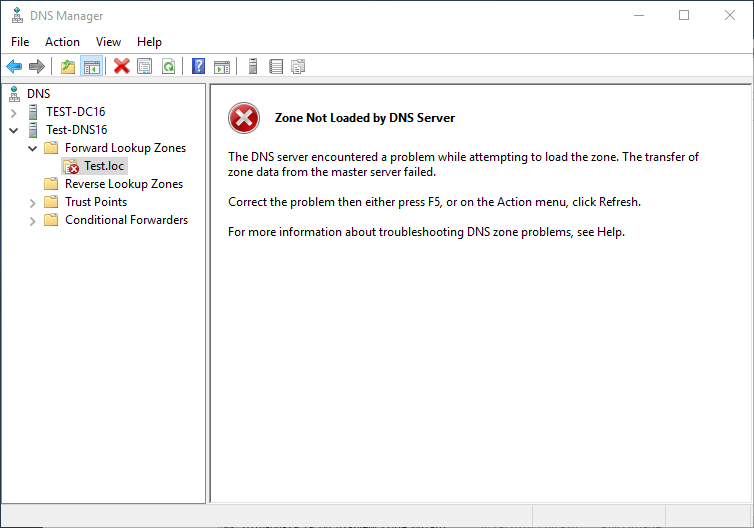
If you get the message “Zone Not Loaded by DNS Server”, please see below
Zone Not Loaded by DNS Server
If you see the following message, it is likely because the master server will not send updates to this server. See the directions below to fix this. These directions will allow zone transfers to all your DNS servers.
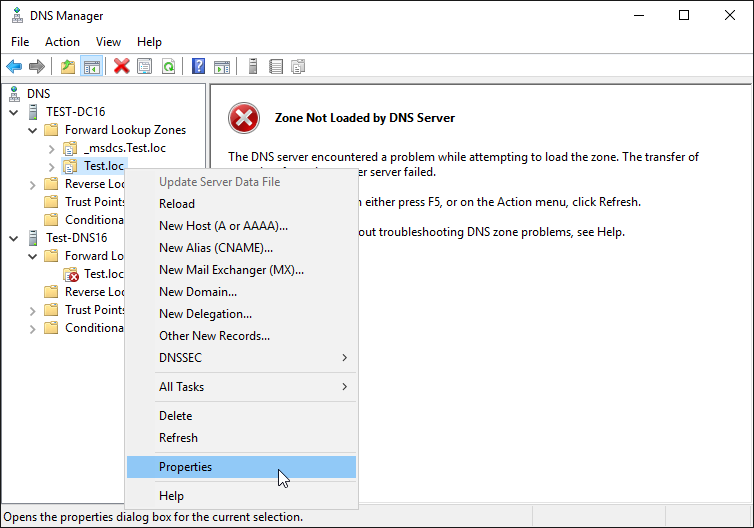
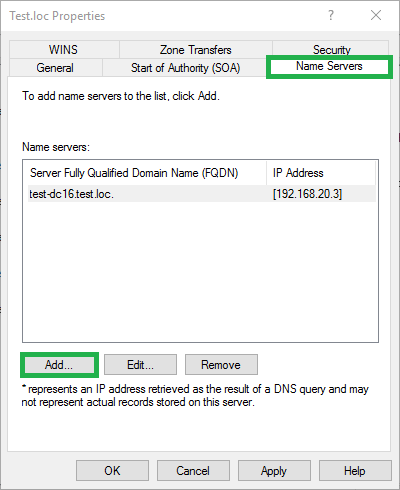
1) Open Properties
Right-click the zone under the master server and select Properties
2) Open the New Name Server Record window
Click the Name Servers tab and click Add
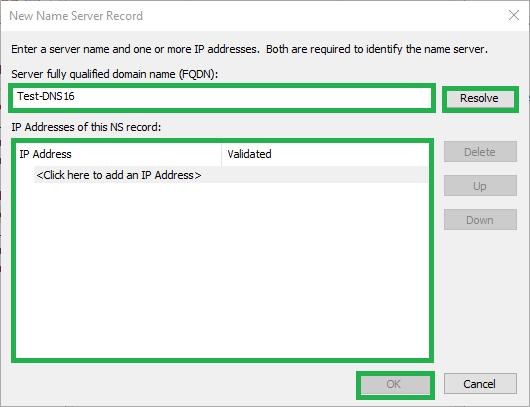
3) Enter the DNS server
Enter the FQDN of the DNS server with the secondary zone and click Resolve
or
Enter the IP address
Click OK
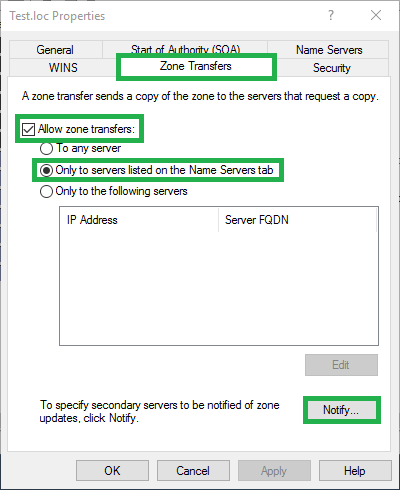
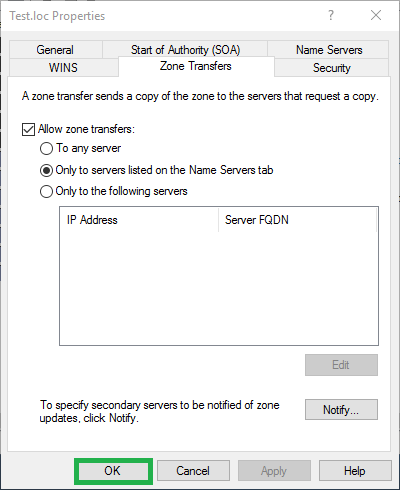
4) Configure the zone transfer settings
Click the Zone Transfers tab
Select the Allow zone transfers check box
Select the Only to servers listed on the Name Servers tab radio button
Click the Notify button
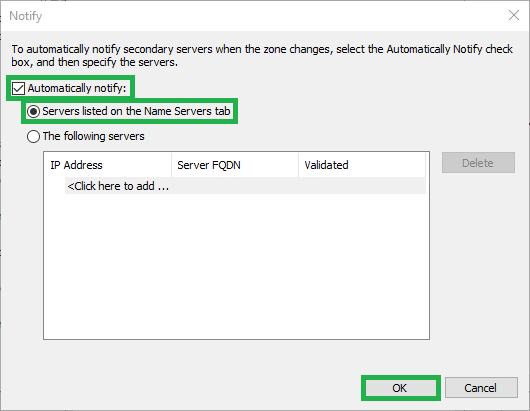
5) Open the New Name Server Record window
Click the Automatically notify check box
Click the Servers listed on the Name Servers tab radio button
Click OK
6) Apply the settings
Click OK
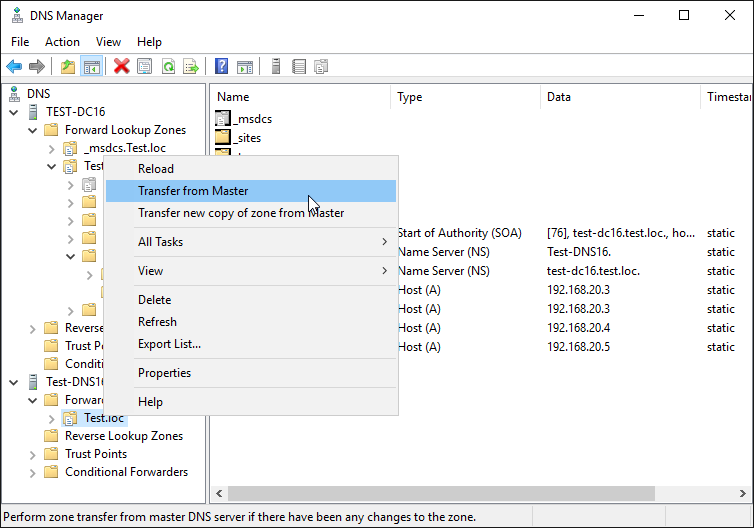
7) Transfer zone from the master
You should now be able to transfer this zone from the master
Right click the zone under the secondary server and select Transfer from Master
It should now show the records from the master server