Configure Server Using Sconfig – Windows Server Core 2016
This is a guide for configuring Windows Server 2016 using sconfig. If you have Server 2016 installed with the desktop experience, you can also use Server Manager to configure your server. To configure with Server Manager, please see Configure Server Using Server Manager – Windows Server 2016.
How-To
Prerequisites
Before starting, you you have Windows Server 2016 installed. If you have not done this, please see Installing Windows Server 2016.
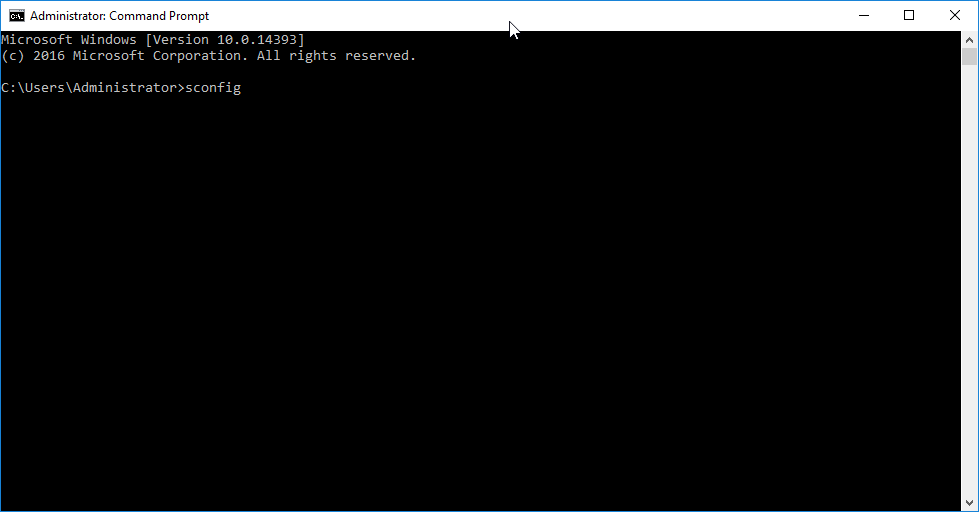
1) Run sconfig
In Command Prompt, type sconfig and hit Enter
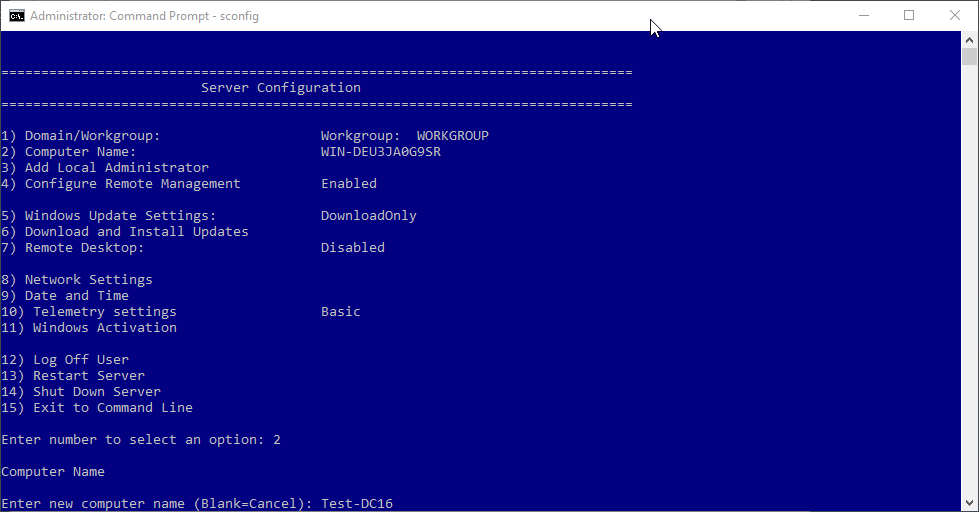
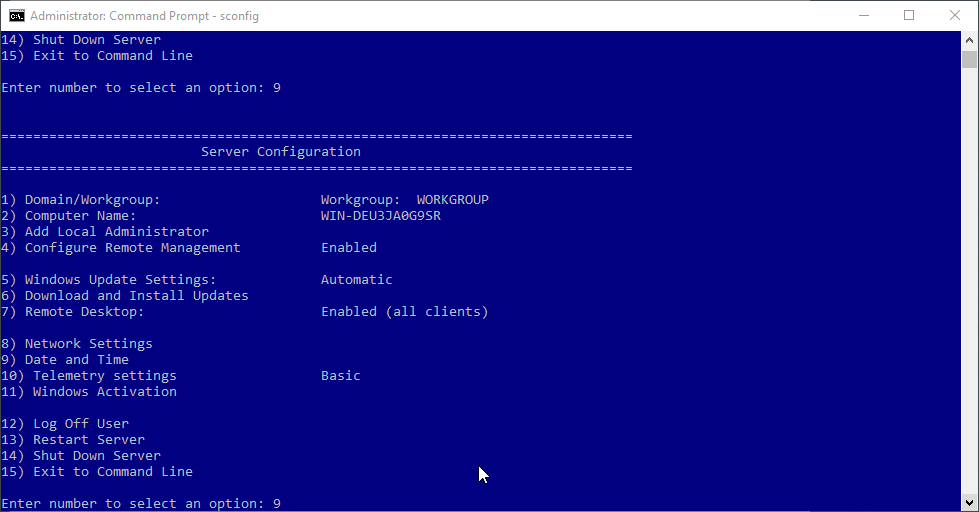
You will now see the Server Configuration Tool (sconfig)

2) Select the setting you would like to change
You will now simply type the number of the setting you would like to change and follow the prompts
Examples:
CHANGE COMPUTER NAME
Type 2 and hit Enter
Enter the new Computer Name and hit Enter
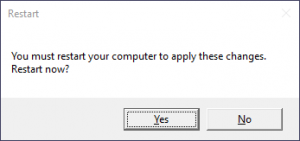
You will get a prompt to reboot, you can do this now or at a later time
WINDOWS UPDATE SETTINGS
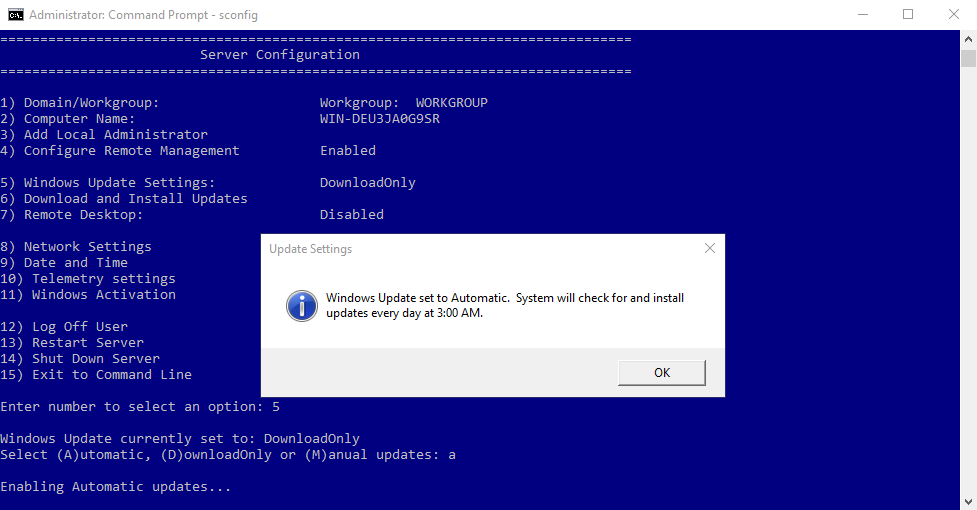
Type 5 and hit Enter
Then type A, D, or M (Automatic, DownloadOnly, or Manual) then hit Enter
An Update Settings window will pop up to confirm the setting was changed, click OK
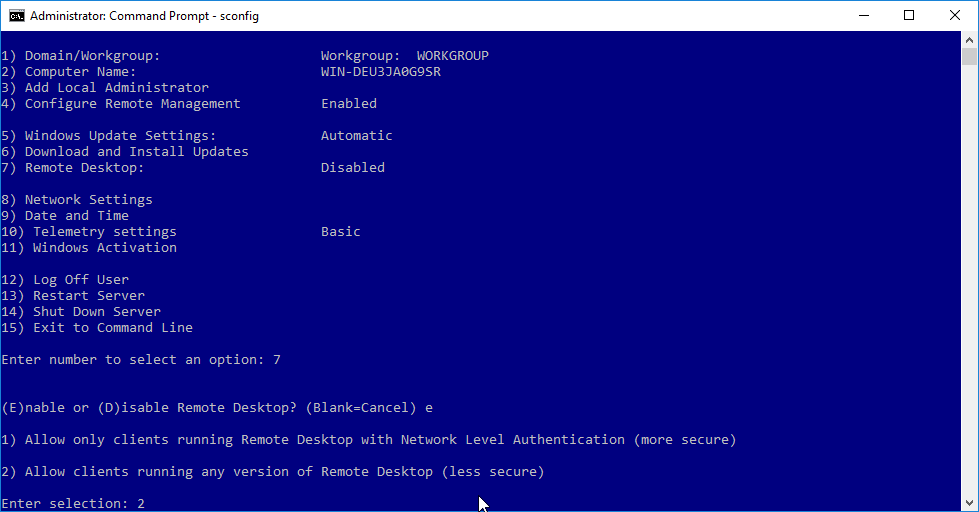
REMOTE DESKTOP
Type 7 and hit Enter
Type E or D (Enable or Disable Remote Desktop) and hit Enter
If you chose to enable, you will now need to type 1 or 2 (see below) and hit Enter
1) Allow only clients running Remote Desktop with Network Level Authentication (more secure)
2) Allow Clients running any version of Remote Desktop (less secure)
It will pop up a Remote Desktop window that confirms the change was made, click OK

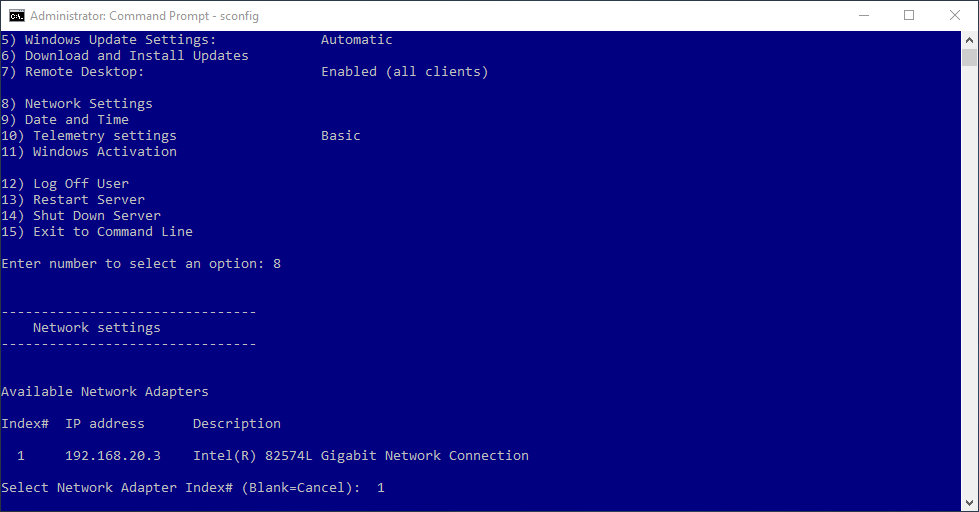
NETWORK SETTINGS
Type 8 and hit Enter
The available network adapters will appear
Type the Index# of the adapter you would like to change and hit Enter
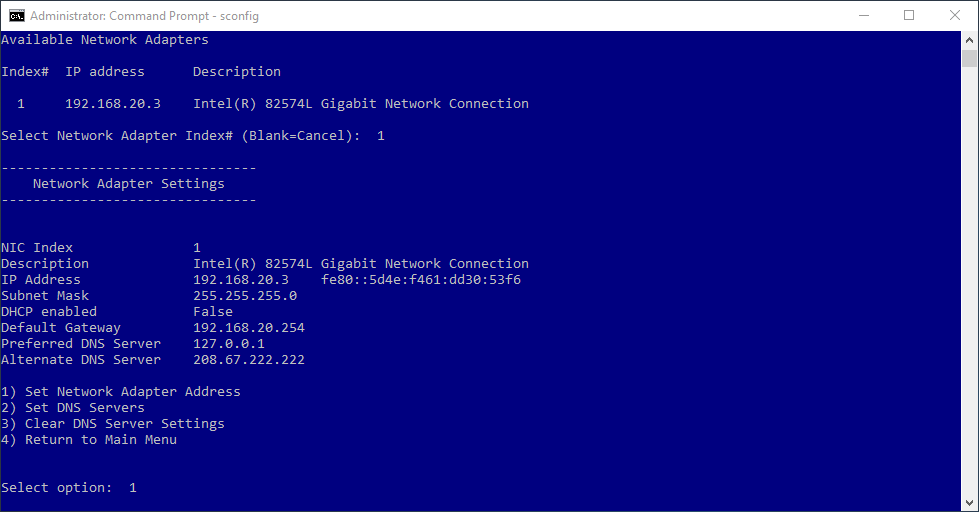
You will now see the Network Adapter Settings you can change
Select the setting you would like to change
In this example we will change the Network Adapter Address (this also changes the subnet mask and default gateway)
Type 1 and hit Enter
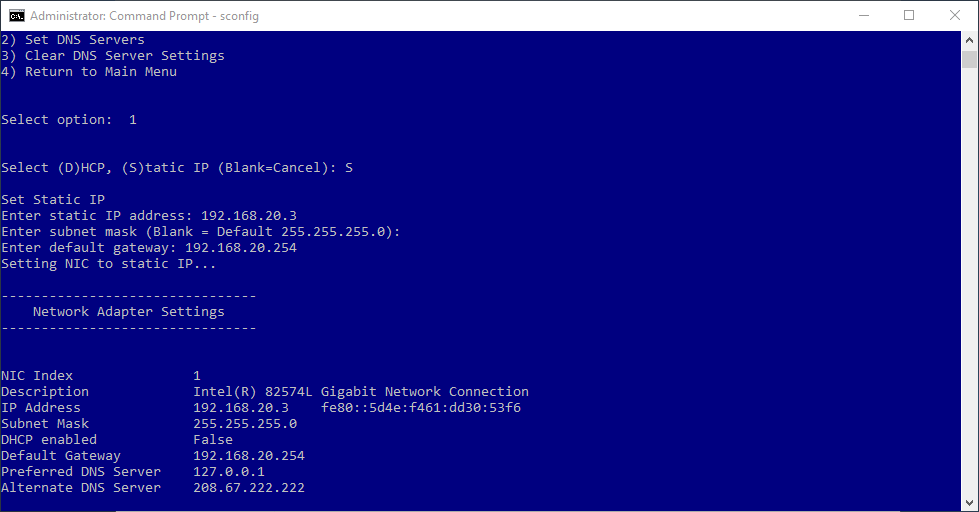
Type D or S(DHCP or Static) and hit Enter
If you selected Static, type the IP address, Subnet mask, and Default gateway, hitting Enter after each
The new settings will be output below
Setting the DNS Servers is a similar process
You will enter and primary DNS server, then the secondary DNS server
A pop-up window will appear to tell you the setting was changed
DATE AND TIME
Type 9 and hit Enter
The Date and Time window will appear
Click Change date and time… and make any changes necessary
Click OK until you are out of the Date and Time window

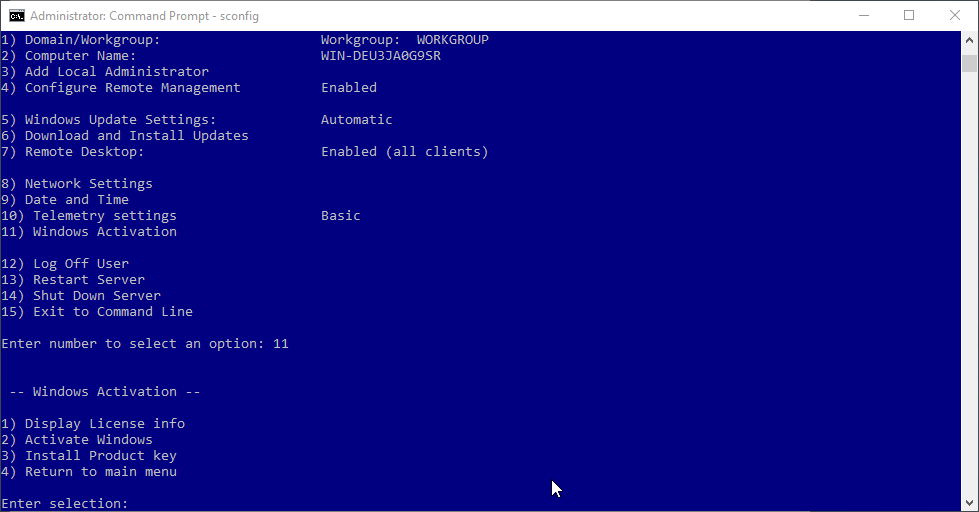
WINDOWS ACTIVATION
Type 11 and hit Enter
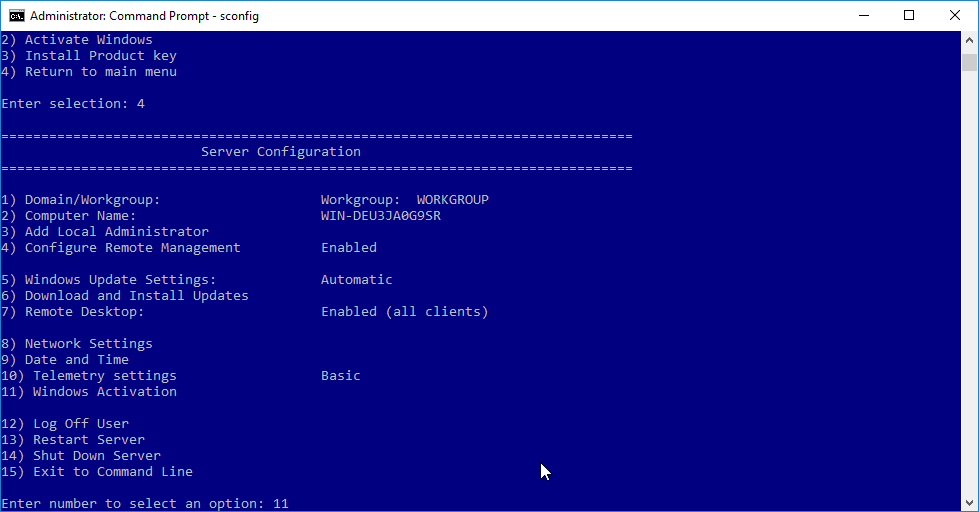
Enter 1, 2, 3, or 4 (see below) and hit Enter
1) Display License Info
2) Activate Windows
3) Install Product Key
4) Return to main menu
If you are choosing options 2 or 3, follow any remaining prompts