Configure Secondary Zone with PowerShell – Windows Server Core 2016
This guide shows you how to add a secondary zone using PowerShell. To do this using DNS Manager, please see Configure Secondary Zone – Windows Server 2016.
How-To
Prerequisites
Before starting, you will need the DNS role installed. If you have not done this, you can use one of the following articles:
For Server Core 2016 or Server 2016 with Desktop Experience
Installing the DNS Role with PowerShell -Windows Server Core 2016
For Server 2016 with Desktop Experience
Installing the DNS Role using Server Manager – Windows Server 2016
Assumptions
In this guide I am adding a secondary zone to the server I am connected to (Test-DNS16). I also make some changes to the server with the primary zone (Test-DC16). These changes are made to make sure zone transfers are allowed to other DNS servers on the domain.
Open PowerShell
1a) Open Command Prompt (cmd) as an Administrator and start PowerShell
If you are on Server Core this is likely already open. If it is not, hold Ctrl+Alt+Del and select Task Manager. Then choose File -> Run new task, type cmd, select Run with administrative privileges and click OK or hit Enter.

Type the word PowerShell and hit Enter
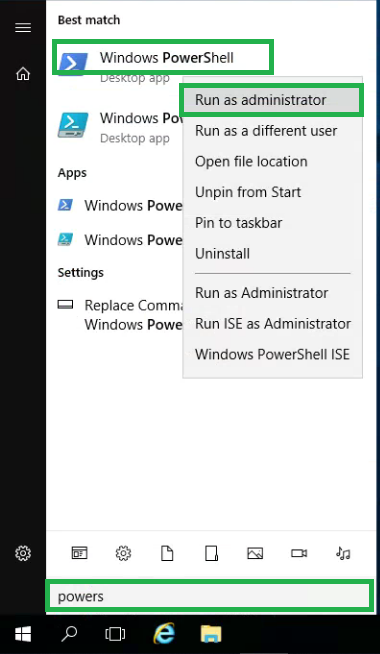
1b) Open PowerShell as an Administrator
If using Server 2016 with the desktop experience, you can simply open PowerShell as an admin
Start typing PowerShell in the Start Menu and then right-click Windows PowerShell and select Run as administrator
Add a Secondary Zone
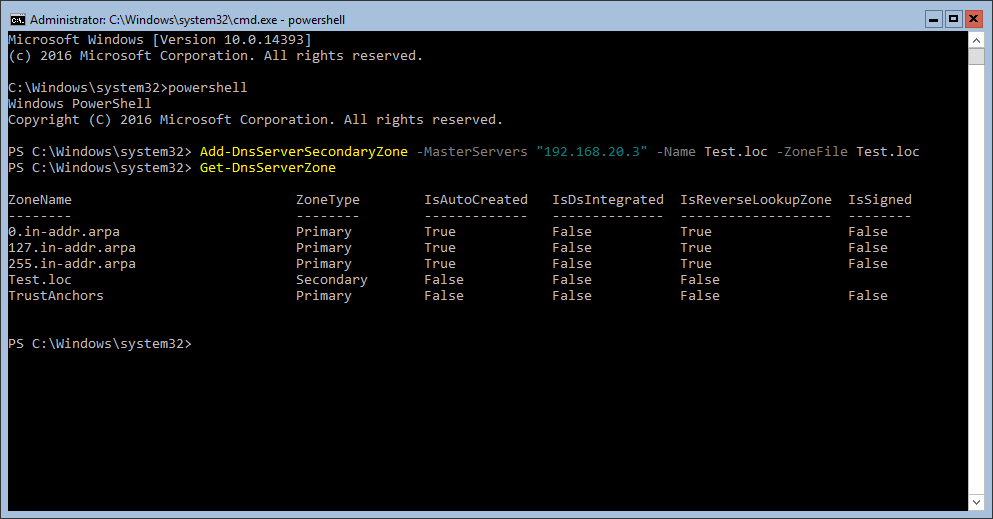
1) Add the secondary zone
Type Add-DnsServerSecondaryZone -MasterServers MasterServerIPHere -Name ZoneNameHere -ZoneFile ZoneFileHere and hit Enter
If there is no error message, this was successful. To confirm, do the following:
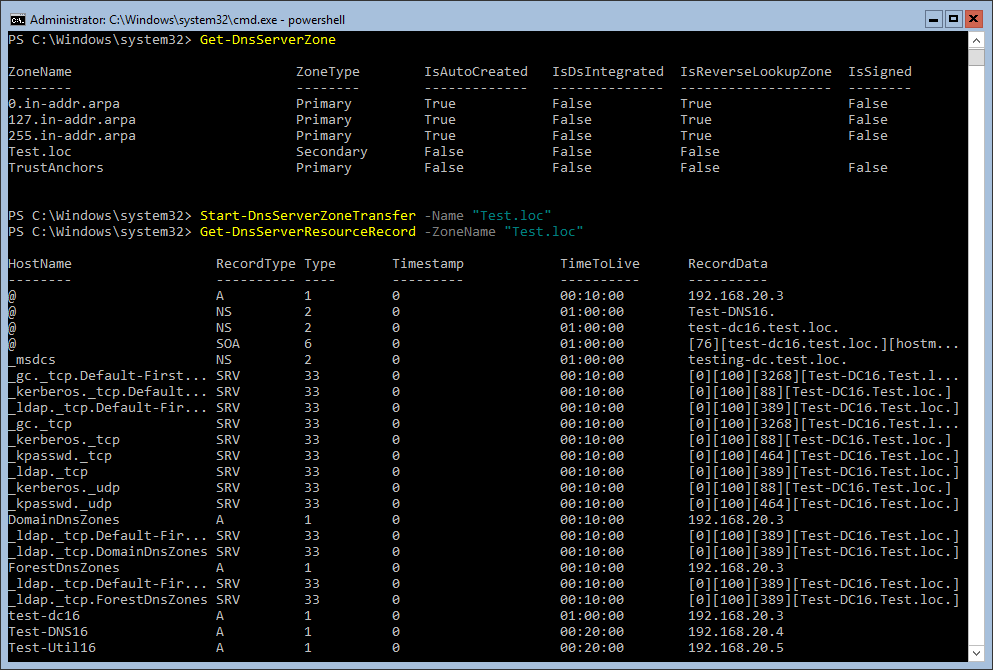
Get-DnsServerZone and hit Enter
You should now see the zone listed. In this example you see the secondary zone “Test.loc” is now on the list.
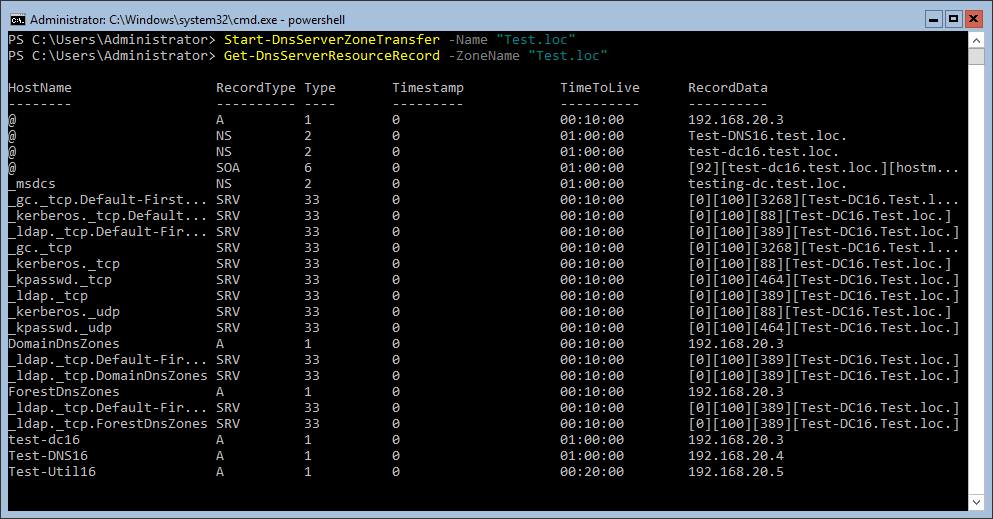
2) Start the zone transfer
Type Start-DnsServerZoneTransfer -Name ZoneNameHere and hit Enter
Type Get-DnsServerResourceRecord -ZoneName ZoneNameHere
If these commands give no errors and the second command outputs the records, you are done. You have successfully created a secondary zone. If you get errors, it may be because you need to make changes to the master server. Please see the instructions below.
Add a Secondary Zone
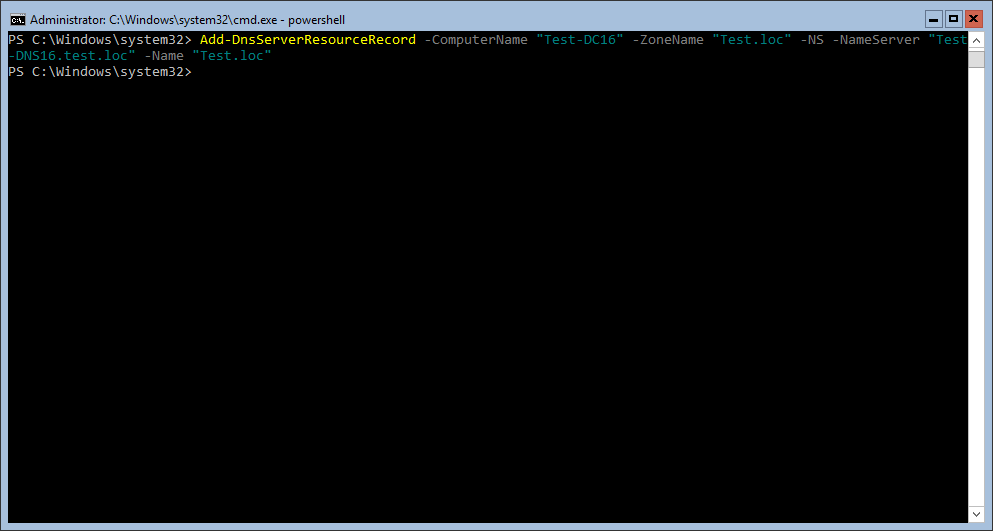
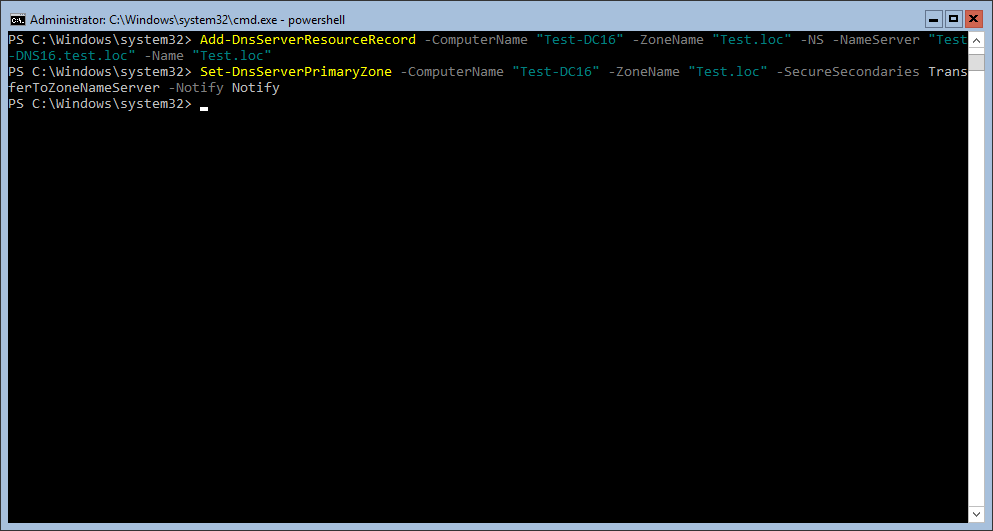
1) Add the new DNS server as a resource record
Type Add-DnsServerResourceRecord -ComputerName MasterServerNameHere -ZoneName ZoneNameHere -NS -NameServer NewDnsServerNameHere and hit Enter
2) Change the zone transfer settings on the zone
Type Set-DnsServerPrimaryZone -ComputerName MasterServerNameHere -ZoneName ZoneNameHere -SecureSecondaries TransferToZoneNameServer -Notify Notify and hit Enter
3) Start the zone transfer
Type Start-DnsServerZoneTransfer -Name ZoneNameHere and hit Enter
Type Get-DnsServerResourceRecord -ZoneName ZoneNameHere and hit Enter
You should now see the records from the zone